
How to replace car headlight bulb led conversion kit is usually straightforward, but the small details decide whether you end up with crisp light output or annoying flicker, warning lights, or glare that blinds other drivers. This guide walks you through the real-world steps: confirming fitment, removing the old halogen, installing the LED kit correctly, and aiming the headlights so you stay legal and safe.
People tend to focus on “getting the bulb in,” then discover the beam pattern looks scattered, the dust cap won’t close, or the car throws a bulb-out message. Most of those problems are predictable if you check a few things before you touch a screwdriver.
I’ll also call out common gotchas: where polarity matters, why some housings hate certain LED designs, and when it’s smarter to stop and ask a shop for help.
Before you buy or start: what makes LED swaps go wrong
If you already have the kit in hand, don’t worry, you can still use this section as a quick diagnostic checklist. But in practice, most “LED conversion problems” come from mismatches rather than bad parts.
- Wrong bulb size or wrong trim: H11 vs H8 vs H9 confusion happens a lot, and some vehicles use different bulbs for low beam, high beam, and DRL.
- Housing type: reflector housings can produce more glare with certain LEDs if the emitter position doesn’t mimic a halogen filament.
- Not enough room: heat sinks, fans, and driver boxes can interfere with the dust cover or nearby wiring.
- CAN bus sensitivity: some cars monitor bulb current; LEDs draw less power, triggering warnings or flicker.
- Aiming ignored: even a good kit can look “too bright” if the cutoff is too high.
According to NHTSA, headlamps are a regulated safety item, and modifications that create glare can raise safety concerns. In plain English, you want more usable light for you, not more discomfort for everyone else.
Quick self-check: is your car a good candidate for an LED conversion kit?
Use this as a fast “am I heading for trouble” test before you start the install.
- You’re likely fine if your halogen low beams are in good reflectors/projectors, you can access the rear of the housing, and the kit includes quality adapters for your bulb type.
- You may need extra parts if your car has a bulb-out warning system, factory DRL on the low beam filament, or very tight rear clearance.
- Consider a different approach if your housing is known for scatter/glare with LEDs, or if your state inspection is strict about non-OE lighting.
If you’re unsure what you have, check the owner’s manual bulb chart, then verify by reading the marking on the original bulb base.
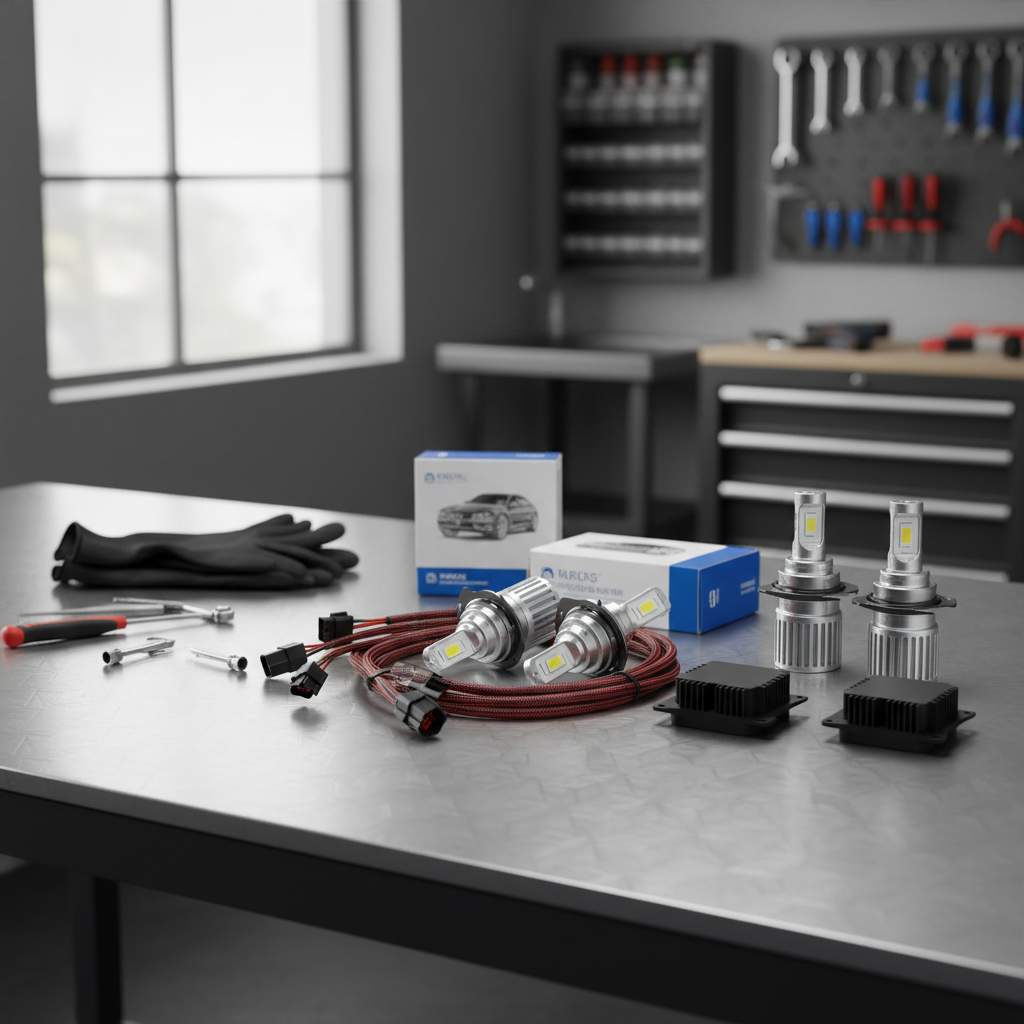
Tools, parts, and safety setup (5 minutes that saves 50)
You don’t need a full toolbox, but you do need a clean plan. Most kits install with basic hand tools, plus a little patience.
Typical tools
- Nitrile gloves or clean gloves (keeps oils off the bulb and your hands clean)
- Small flathead screwdriver or trim tool (for clips/covers)
- 10mm socket/ratchet (common for intake snorkels or battery hold-downs)
- Zip ties and alcohol wipes (for cable management and surfaces)
- Painter’s tape + measuring tape (for aiming)
Safety notes that matter
- Turn lights off, remove the key, and let the housing cool.
- If access is tight near the battery or fuse box, disconnecting the negative terminal is often a sensible precaution. If you’re not comfortable doing that, a shop can help.
- Don’t stare into powered LEDs at close range, it can be uncomfortable and potentially risky.
Step-by-step: how to replace halogen with an LED conversion kit
This is the core workflow for how to replace car headlight bulb led conversion kit in most US vehicles. Your access path may vary, but the order stays similar.
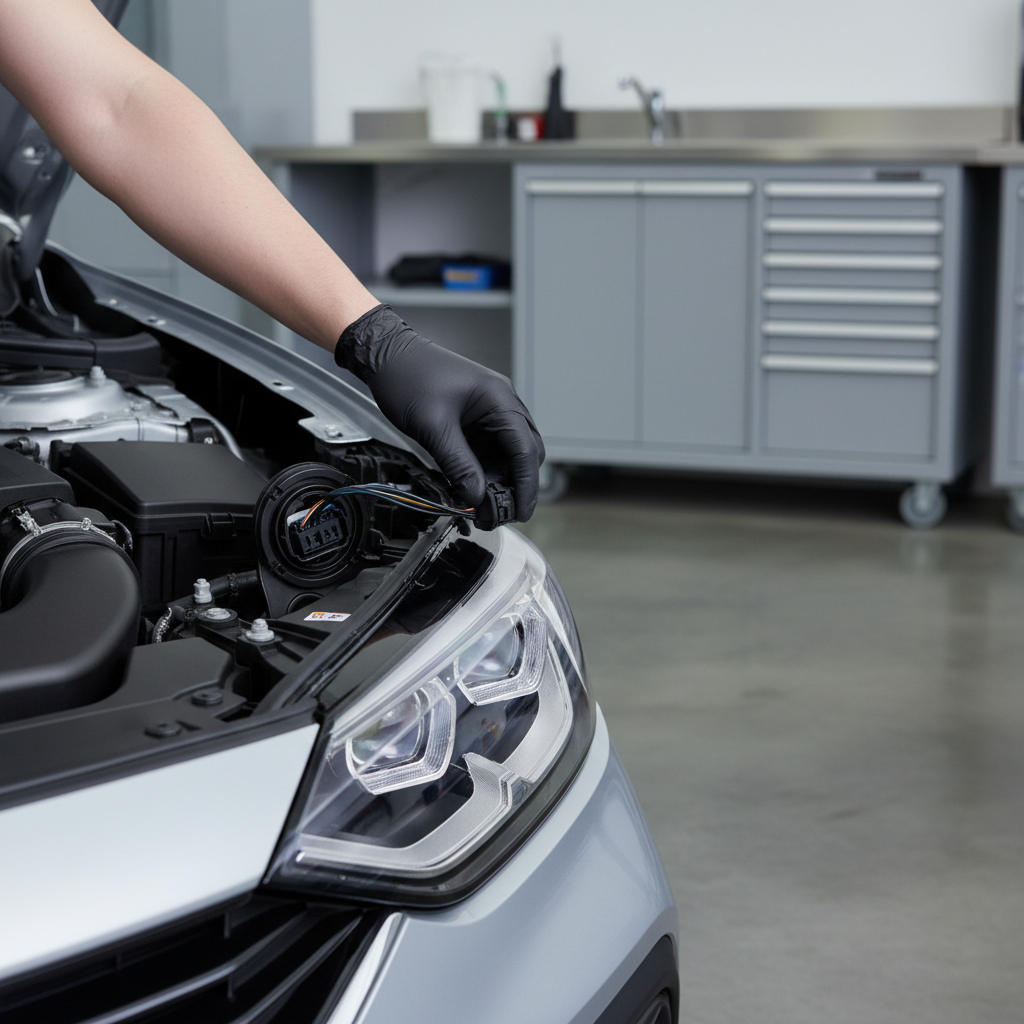
1) Get access to the rear of the headlight
- Open the hood, locate the low-beam housing (usually closer to the center of the car).
- Remove any covers, intake tubes, or brackets blocking your hand. Set fasteners aside so nothing drops into the bay.
2) Unplug the old bulb connector
- Press the locking tab, then pull straight back.
- If it feels stuck, recheck the tab position; forcing it can break the connector.
3) Remove the halogen bulb
- Most bulbs release with a quarter-turn counterclockwise, then pull out.
- Some use a retaining clip or ring; take a quick photo before removal so reassembly is obvious.
4) Test-fit the LED bulb and any adapter ring
- If your kit uses a separate mounting collar, lock the collar into the housing first, then insert the LED body.
- Check that the LED seats flat and doesn’t wobble; a slight tilt can ruin the beam pattern.
5) Orient the LED emitters correctly
Most reflector/projector setups want the LED chips facing left and right (3 o’clock and 9 o’clock), not up and down. This mimics the halogen filament position more closely, which often reduces glare and improves cutoff. If your kit has adjustable clocking, use it.
6) Connect the driver and wiring, then secure everything
- Plug the LED into the factory harness (or into the included adapter).
- If the kit has a driver box, mount it away from high heat and moving parts.
- Zip-tie slack so wires don’t rub on sharp metal edges.
7) Check dust cap fit and sealing
- If the dust cap won’t close, don’t leave it off “for now.” Moisture inside the housing becomes a long-term headache.
- Some vehicles need extended dust caps; many kits sell them separately.
8) Power on and verify operation
- Confirm both sides light up, and that high/low beam functions are correct if you swapped both.
- If one side doesn’t turn on, flip the connector polarity (common on some LED kits).
Beam pattern and aiming: the part most people skip (and regret)
Even if your install is perfect, you still need to aim. This is where a conversion can feel “amazing” or feel like a constant flash-from-oncoming-traffic situation.
According to IIHS, glare and proper headlight performance are key safety factors, and headlight evaluation considers how light is distributed on the road. You can’t replicate a lab test at home, but you can avoid obvious mis-aim.
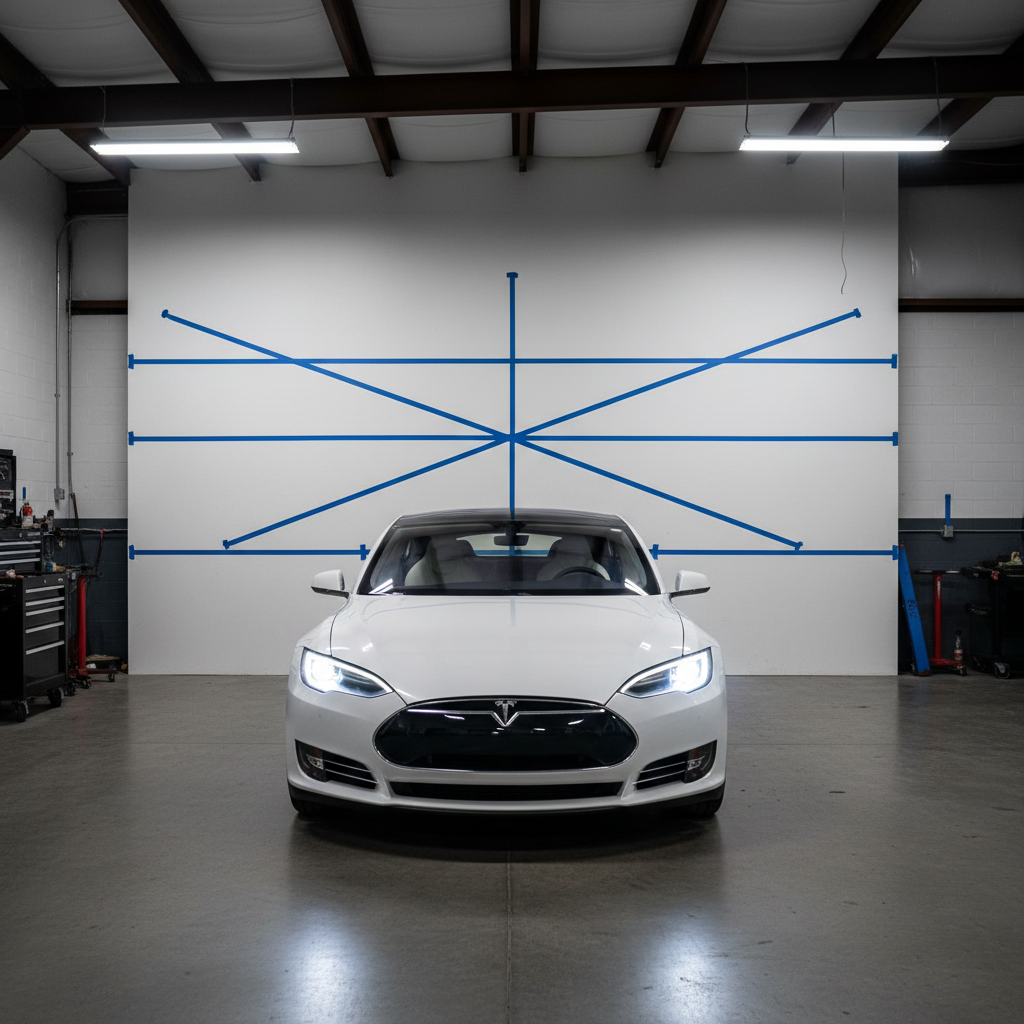
Basic driveway aiming method
- Park on level ground facing a flat wall, about 25 feet away (many DIYers use 20–25 feet).
- Make sure tire pressure is normal and the car is at typical load.
- Use painter’s tape to mark the horizontal cutoff line from your current beam, then compare after the swap.
- If the new cutoff is higher, bring it back down using the factory vertical adjuster.
Practical rule: if you can’t find a clean cutoff and the pattern looks “blown out,” the LED placement or compatibility is the likely issue, not the aim screw.
Troubleshooting table: flicker, warning lights, dim output
When people search how to replace car headlight bulb led conversion kit, they often mean “I installed it and something feels off.” This table covers the common realities.
| Symptom | Likely cause | What to try |
|---|---|---|
| One bulb doesn’t turn on | Polarity mismatch, loose connection | Flip the connector (if applicable), reseat plugs, check ground |
| Flicker at idle or random strobe | PWM signal, CAN bus monitoring, weak driver | Try a CAN bus decoder/anti-flicker harness, verify kit quality |
| Bulb-out warning on dash | Car expects higher current draw | Add load resistors or CAN bus module rated for your bulb type |
| Radio interference | Poor EMI shielding in driver | Re-route wiring, use ferrite cores, consider a better EMI-rated kit |
| Beam scatter/glare | Emitter position mismatch, poor seating, incompatible housing | Re-clock LED chips, ensure locked seating, consider returning kit |
| Condensation in housing | Dust cap not sealed, gasket displaced | Restore sealing, dry housing, replace cap or gasket |
Common mistakes that waste time (and how to avoid them)
- Installing without a test power-up: do a quick light-on test before buttoning up covers, it saves rework.
- Letting the driver box dangle: vibration kills connections, mount it securely.
- Assuming “brighter” equals “better”: a tight, controlled pattern usually beats raw lumen claims.
- Skipping both sides: mixing halogen on one side and LED on the other often looks odd and can change perceived depth at night.
- Ignoring legality and inspection: in some places, inspectors look for correct color, aim, and proper operation, so keep your originals as a fallback.
When it’s worth asking a pro
If you run into repeated flicker, persistent warning codes, or you can’t achieve a clean cutoff after clocking and seating checks, a lighting-focused shop can diagnose faster than trial-and-error. Also consider professional help if access requires removing the bumper, wheel liner, or other components where clips and fasteners can break.
And if your vehicle uses factory HID projectors or adaptive headlight systems, converting components can be more complex and sometimes not worth the risk; in those cases, it’s reasonable to consult a qualified technician.
Key takeaways and a simple next step
If your goal is a clean upgrade, treat the LED conversion like a small system, not just a bulb swap: confirm fitment, install with correct orientation, seal the housing, and aim the beam. Do that, and how to replace car headlight bulb led conversion kit becomes a predictable Saturday project instead of a week of chasing flicker and glare.
Next step: pick one headlight, do a careful test-fit and power check, then repeat on the other side only after you like the beam pattern on the wall.
FAQ
How long does it take to replace a headlight bulb with an LED conversion kit?
Many vehicles take 20–60 minutes for both sides, but tight engine bays can stretch longer. The time usually goes into access and cable management, not the bulb twist itself.
Do I need resistors or a CAN bus decoder for my LED headlight kit?
Some cars need them, some don’t. If you get flicker or a bulb-out warning after installation, a decoder or resistor harness is a common fix, but you want parts rated for your bulb type and mounted safely because resistors can run hot.
Why do my LED headlights look bright but I can’t see farther down the road?
That’s often beam focus, not output. If the LED emitters aren’t positioned like the original filament, the light can scatter upward and sideways, making foreground bright while distance stays dark.
Can I install an LED kit in a reflector housing without blinding other drivers?
Sometimes yes, but reflector housings are more sensitive to LED design and seating. Look for a controlled cutoff on a wall test, and be willing to change orientation or swap kits if the pattern stays messy.
My dust cap won’t fit after installing the LED bulb, what should I do?
Don’t leave it open. Check whether the kit allows a slimmer heat sink, reposition the driver and wiring, or use an extended dust cap designed for your housing to keep moisture out.
Should I replace both headlights at the same time?
In most cases, yes. Matching color and intensity on both sides reduces visual imbalance and keeps your nighttime perception consistent.
Is it okay to touch the LED bulb during installation?
It’s better to avoid touching the emitting surface and any sealing areas, mostly to keep things clean and reduce the chance of contamination. Gloves also help you grip and seat the bulb without slipping.
If you’re trying to upgrade lighting but you’d rather avoid guessing on bulb size, dust cap clearance, or anti-flicker add-ons, it can be worth using a vehicle-specific fitment tool or asking a lighting shop to confirm compatibility before you commit to the kit.